Create and render your first video
Create an editable project, then render it into a video file you can watch and download.
When to use it
Follow this walkthrough when you want to make a first video using the dashboard and visual editor. A project is your editable design. A render is the cloud job that turns that design into a finished file. Saving a project and rendering a video are separate actions.
Before you begin
- Create an account and complete setup.
- Check your available rendering credits. Credits pay for cloud rendering; browser preview does not start a paid render.
How to create a video
Navigation: Dashboard → Create video → Editor.
-
Sign in at app.zvid.io.
-
Select Create video in the top bar. The visual editor opens in a new tab. Allow the browser to open that tab if it was blocked.
-
Enter a descriptive Project name, such as
My first video. -
Choose a Resolution preset for your destination. On a compact screen, open Project settings to see these controls.
-
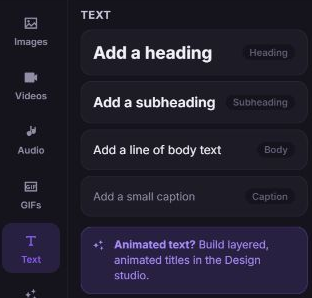
Select Text in the tool rail, then Add a heading. Click the added text, or use Selected element actions → Edit properties, then enter your message under Design → Content. See add and style text.
-
Use the timeline to check when the heading appears and how long it remains visible. For a first test, keep the project short.
-
Use Play (Space) to preview it. Adjust the text, layout or timing until you are satisfied. The browser preview is an editing aid; the cloud output is the final result.
How to save the editable project
- Select Save in the editor toolbar. On a compact screen, its icon remains available even when the text label is hidden.
- If prompted, sign in with the same Zvid account.
- In Save project to your account, check the Project name and select Save project.
- Return to Dashboard → Projects to find the saved draft. Use Open in editor to continue editing later.
See save, import and reopen projects for saving an existing project or making another cloud copy.
How to render your first video
Navigation: Editor → Render.
-
Select Render in the editor toolbar.
-
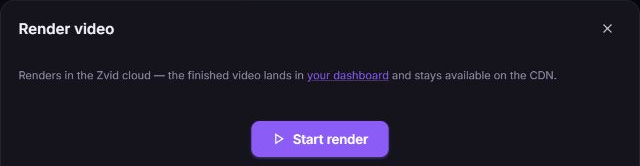
Review the project information and available credits in Render video. Correct any validation errors shown in the dialog.
-
Select Start render once. This submits a cloud rendering job and can spend credits.
-
Follow the queue and rendering progress. When rendering finishes, use Download in the dialog or open the dashboard's Renders page.
Submitting another render can incur another charge. If the connection drops after you select Start render, check Dashboard → Renders before submitting again. Closing the dialog does not cancel a submitted cloud job.
Where the finished video is stored
Navigation: Dashboard → Renders.
The completed render has a Ready badge and an output URL. Use its three-dot menu → View to open the output, or Download to save a copy on your device. The saved design stays separately under Projects.
The render list loads the latest 50 jobs for the selected media type. Download important deliverables for your own records; a project draft is not a downloaded video. See find, view and download renders.
Troubleshooting
The editor did not open
Cause: Your browser may have blocked the new tab.
Solution: Allow the editor tab or open editor.zvid.io directly. Use the same account when saving and rendering.
Start render is unavailable or the render fails
Cause: The project may have validation errors, assets may be inaccessible, or your account may lack available credits.
Solution: Read the displayed error, correct the project and check Credits. Follow troubleshoot a render before submitting another job.
What happens next
You have an editable draft and a separate finished video. Reopen the draft to make another version, or turn a repeated design into a reusable template.