Canvas settings and positioning
Set the output frame and arrange each element's position, size, rotation, and stacking order.
When to use it
Choose a landscape, portrait, or square canvas before composing your video. Use the stage for visual placement and Layout fields when you need exact coordinates.
How to change video dimensions and frame rate
Navigation: Editor → Project settings; the settings appear directly in the top bar on wider screens.
- Open Project settings if its controls are collapsed.
- Choose a Resolution preset, or select custom.
- For custom, enter Width (px) and Height (px).
- For video projects, set Frame rate using the control marked fps.
- Choose Background color and Output format.
- Check the stage and reposition content after a size or aspect-ratio change.

Hosted video renders accept integer frame rates from 1 to 60 and output formats mp4, mov, avi, and webm. Some editor controls accept broader input, but your render must still meet hosted validation and plan limits. See Validate and estimate and resolution presets.
Image projects use png, jpg, or webp and hide video duration and frame-rate controls. Image quality and transparency are available in the render dialog.
How to position and resize an element
Navigation: Editor → select an element → Design → Layout.
- Click or tap the element on the stage. If it is not visible at the current time, select it on the timeline.
- Drag to move it, resize with its handles, or use the rotation handle.
- In Layout, set Position preset for a standard position, or enter X (anchor point) and Y (anchor point).
- Choose Anchor: this is the point of the element placed at the X and Y coordinates.
- Set Width, Height, Rotation, and Opacity as needed.
- Use Flip horizontally or Flip vertically to mirror the element.
A position preset overwrites the current X/Y coordinates. An empty width can use the source's intrinsic or measured size. For images and footage, use Resize mode to control fit and cropping.
How to arrange overlapping elements
- Select a visual element and open Selected element actions, or right-click it.
- Choose Bring forward (track +1) or Send backward (track −1) in a video project. Higher visual tracks appear in front.
- Alternatively, set Design → Layout → Track (z) or move the clip to another visual timeline track.
- In an image project, use Layers or the Bring forward and Send backward actions to reorder the layer stack.
Use Shift+click to select several stage elements and move them together. Duplicate creates another element; Delete removes the selected element from the project. Use Undo for an unintended local edit.
How to manage an image project's layers
- In an image project, open Layers.
- Click a row to select its element. The top of the list is the front of the image.
- Drag a row to reorder it, or use Bring forward and Send backward.
- Use Replace image (keeps size, position and effects) on an image layer to choose a new source.
- Use Duplicate to copy a layer or Delete layer to remove it from the composition.
Removing a layer does not delete its uploaded asset. Use Undo to restore an unintended local layer deletion.
How to zoom, pan, and align
- Use Zoom in or Zoom out below the stage. Clicking the zoom percentage uses Reset to fit.
- Turn on Pan canvas and drag to move the view around a zoomed composition. Turn it off before moving elements.
- Enable Toggle snapping to align elements with stage guides.
- Use Toggle safe margins to show composition guides.
Canvas zoom, safe margins, and pan change the editing view. They do not change output dimensions.
How to add an animated canvas background
- Open Canvas in the tool rail.
- Browse Canvas presets. Hover a tile with a preview to see it animate.
- Click a preset to add its full-frame element.
- Select it and use its properties to adjust timing and layout.
- For code-level changes, open Effects → Animation code (customCode).
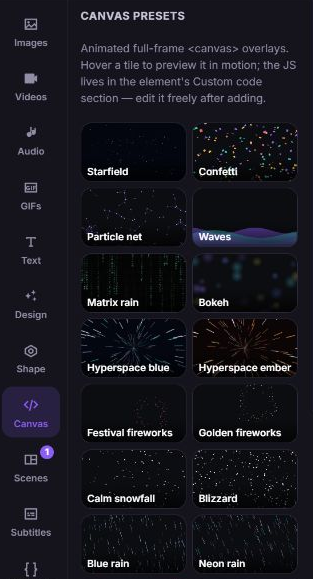
These presets add elements to the composition; they are separate from the project Background color setting. See Animations and transitions before editing animation code.
What happens next
Your geometry and output settings are saved with the project. Check preview at the new dimensions, then render to verify final framing and output.